Accessing VideoEngager Settings
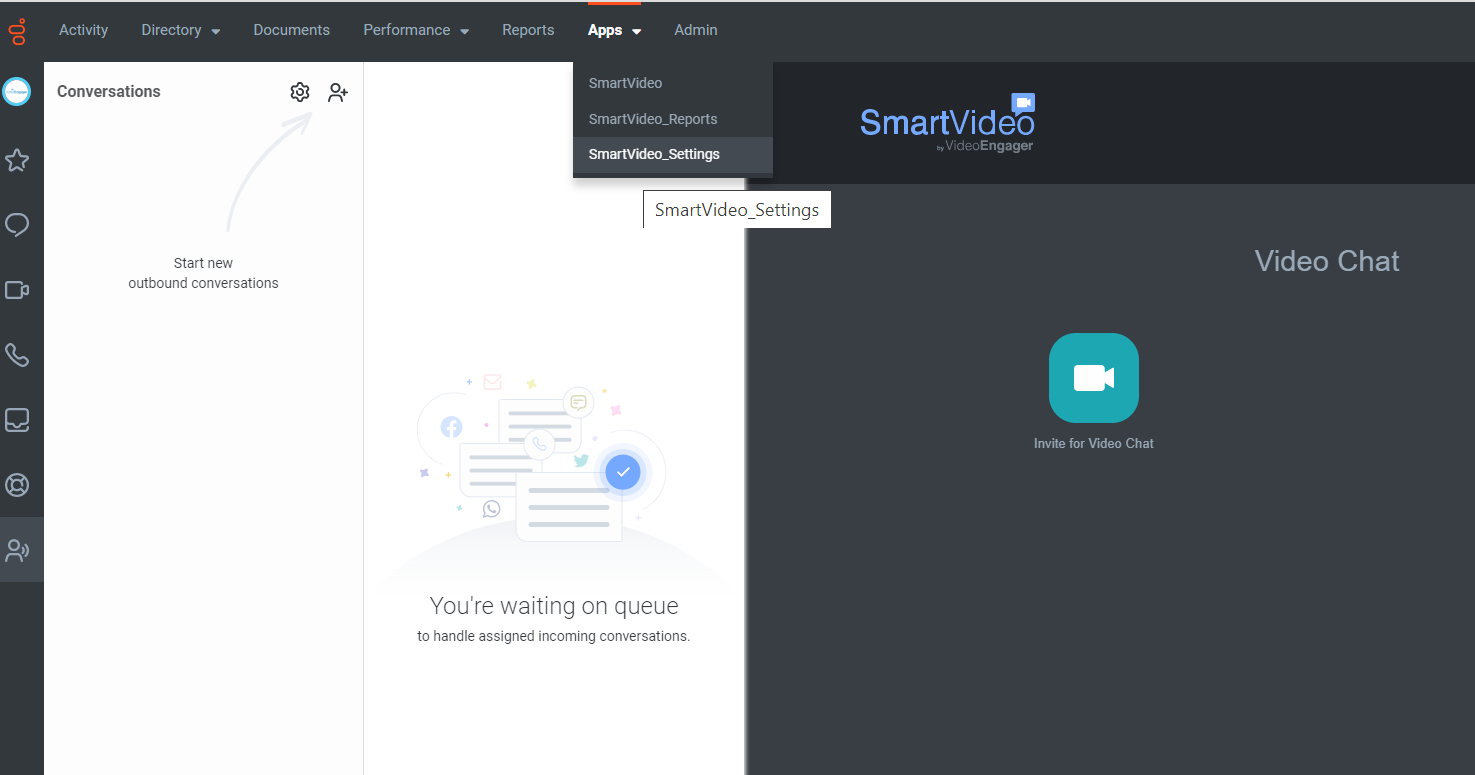
The VideoEngager application has a wide range of settings configurations that can be accessed through the Genesys Cloud interface. To access the VideoEngager settings select the SmartVideo_Settings option from the apps drop down menu as illustrated in the image below. This will take you to the settings configuration menu.

The Settings menu is divided into 3 tabs based on the category of the setting. The categories are SmartVideo, Branding, and PureCloud. SmartVideo's functionality can be configured to your organizational preferences by turning settings on and off as illustrated in the image below.
Please note that for a setting change to take effect, the settings must be saved by clicking the SAVE button at the bottom of the settings page as shown below. The SmartVideo application must be refreshed once the setting has been saved.

Settings Functionality Descriptions
Below are descriptions of the various settings available across the 3 categories available:
SmartVideo Settings Tab:
SmartVideo Tenant ID - Unique identifier supplied by your organization utilized in facilitating SmartVideo connections. Please include this in all support requests to the VideoEngager team.
Visitor's Camera - Controls if the visitor starts the video interaction with Camera on/off.
Agent's Camera - Controls if the agent starts the video interaction with camera on/off.
Agent Camera Control - Allows agent to turn camera on/off during the video interaction.
Visitor Camera Control - Allows the visitor to turn camera on/off during the video interaction.
Visitor ScreenShare Control - Allows the visitor to be able to share their screen with the agent during a video interaction.
Agent ScreenShare Control - Allows the agent to be able to share their screen with the visitor during a video interaction.
Snapshot - Allows the agent to save an image of the visitor's video stream during a video interaction.
Annotation for Snapshots - Allows the agent to make notes and insert pointers on a saved snapshot.
Language - The language drop down menu selects the language which the agent and visitor widgets will utilize.
Visitor PreCall Page - Allows the visitor to make a camera/microphone/audio selection prior to joining a video call.
Virtual Background - Allows the uploading and selection of a virtual background that will be displayed while the visitor is waiting to connect.
File Transfer - Enables file transfer functionality. This can be enabled/disabled for only the agent or the visitor in the file transfer submenus.
Branding Settings Tab:
Record Video Calls - Enables the video recording functionality for the entire organization.
Join by Video Pin - Generates 4 digit PIN for the visitor to join a video interaction through the Customer PIN Entry Page as an alternative to a regular URL Link.
Comments
0 comments
Please sign in to leave a comment.